Sunday, July 13, 2014

Post emergence Safe Crabgrass Killer


Post emergence Safe Crabgrass Killer


This is crabgrass.  Yeah, I admit I have crabgrass.  The only downside to my new ecological lawn is that crabgrass preventive would also kill off the flowers and microclover in my lawn.  Microclover is awesome, it means never fertilizing your lawn.

Anyway, the crabgrass has to go.  Preferably using something that wouldn't also kill my dogs or harm the environment.  Well, I finally found something that works.  


But you first have to get the crabgrass wet.  You can use just water or a mix of water and dishsoap for an extra punch.  Or throw the sprinkler on the area.   The goal is get the plants wet to give the baking soda something to stick to.  Other people have even mixed some molasses in the water, I didn't find this necessary.


Sprinkle your victim with baking soda.  Use generously, however, be careful as this will kill the grass too.


And now wait, it takes a few days.  Heat helps.  If it is really hot, this seems to work faster and better.  The crabgrass above was treated 3 days ago. 

Friday, July 4, 2014

DIY Framed Magnetic Makeup Boards


Bathroom organization

 brought to you by the power of magnetism

Today's project is more for the ladies out there, magnetic makeup boards.  So I have been using mineral makeup for years now and those little containers can be an OCDs nightmare.  I've tried many ways to organize them and still be able to see all the colors.  I'm a huge Everyday Minerals fan and the lids on their containers are white and the container itself is clear.  So if I can see the bottom of the containers, which also happens to have the color name on the bottom, then life is good.   So I bring you, the magnetic makeup board.
What you need:

A frame of your choice, can be any size and shape you want.  I am using two 11" x 14" frames I found at my local hobby store.


A galvanized sheet of metal.   I scored this one at my local big box home improvement store in the welding department for $10.


If you frame came with glass, take that out, then if your mirror came with backing you have an instant template.  Cut your metal sheet to fit that size.  Resemble your frame and ta-da.


Now the magnetism part.   You will need one hot glue gun, some magnets ( I used 6 mm magnets, bought really cheaply online)  an orange stick or wood stick of some kind helps save your fingers and a piece of aluminum foil.  Oh and your makeup containers.


Now just dab on some glue in the center, place a magnet, the wood stick really helps for this and the secret, immediately press the magnet side down onto a sheet of aluminum foil.  This flattens and levels the glue so that the glue does not end of up higher than the magnet so the magnet makes good contact.


 These cool really fast.  In a minute or two they will be ready and can be peeled off the foil.

 You can even do tubes.  These are powered mineral makeup in a roll on tube.  Lipsticks work great too.  I used one magnet per tube or small jar, 2.5 gram, and two or three magnets on the large containers, 5.5 gram.


And the finished product.  


This is bonus storage for any of you lucky people that own Ikea cabinets.  The sides and backs of the drawers are metal.  So...magnets stick to metal.  I am using the drawers sides to store all kinds of things.  It works fabulous for lipsticks and such.  


Blushes attached to side of drawer.


Bonus tip for all you mineral makeup users:

And if your going to the craft store, pick yourself up one of these.  They are in the painting supply isle.  They are super cheap, talking .99 cents here or less.  They are great for applying color, mixing with mediums, or just using to apply dry powers with a wet brush and not contaminant your main container.

Friday, May 9, 2014

Landscaping....The Blank Slate

The Grand Plan
March 2014

And it begins....the great thing about building a house on a new acreage is the landscaping is a blank slate.  The bad thing about building a house on a new acreage is the landscaping is a blank slate.  We have nothing but a lot of dirt, some miscellaneous piles of gravel and cement left by the construction crews, and alfalfa, mmm...so chewy.


Here's our starting point.


And the back.   It's a little like House on the Prairie; we need just a little less prairie and a little more garden.

   
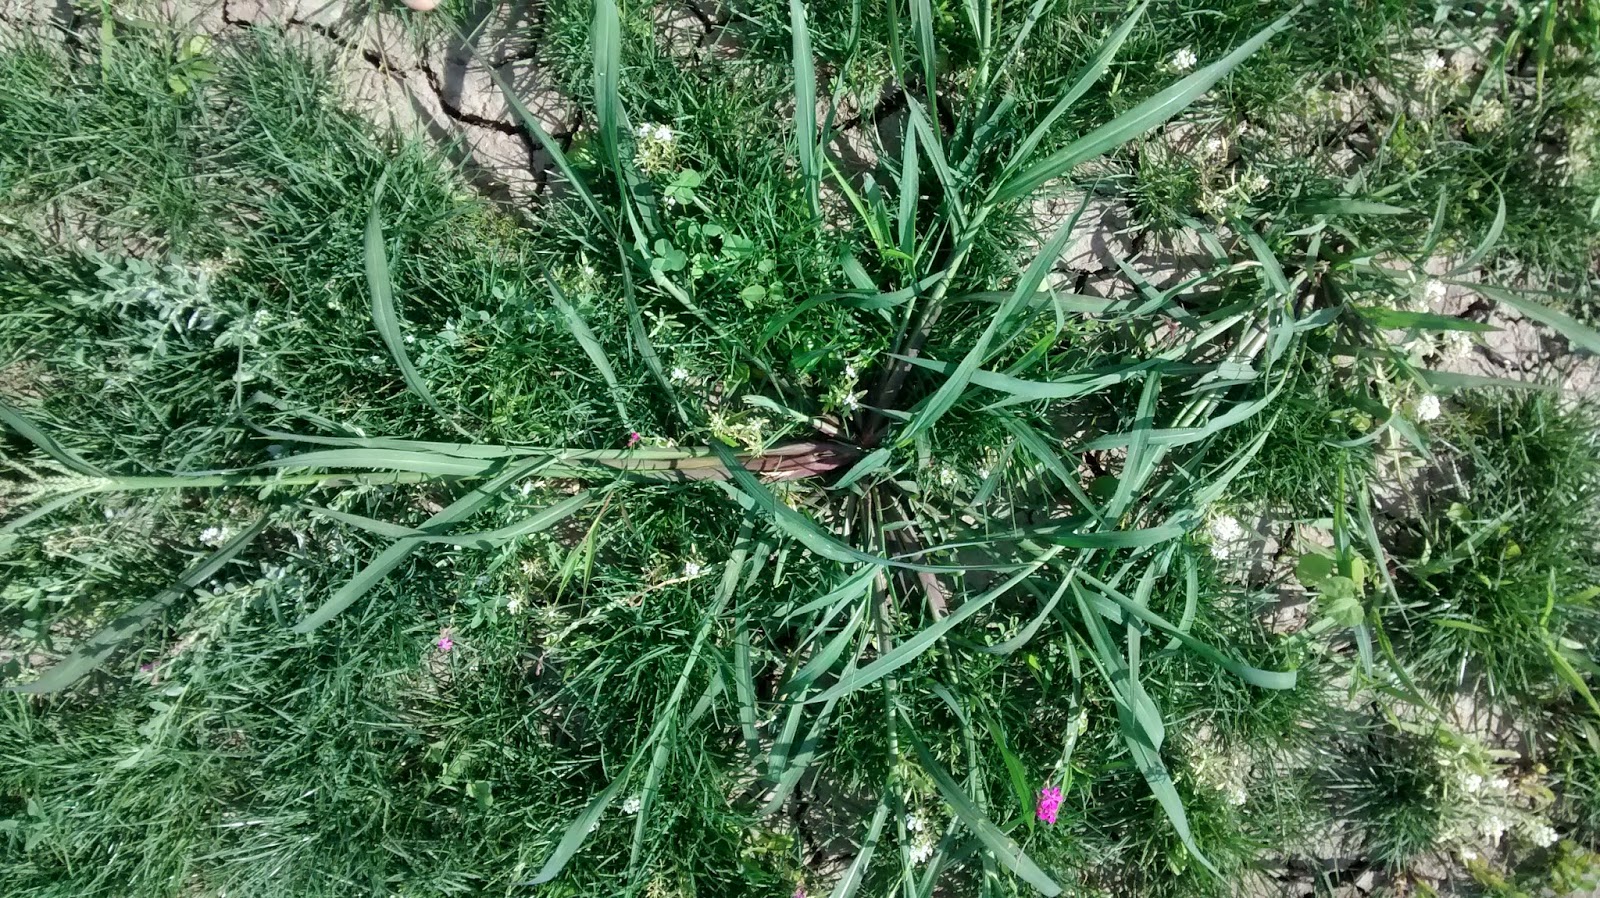
 Here's what were we working with folks.  It's mostly alfalfa, some weeds, a tiny bit of grass and some ground squirrels and a lot of clay soil.  We do have the alfalfa on our side as this land as been an alfalfa field for years, so we should have quite a bit of nitrogen in the soil (alfalfa is a nitrogen-fixing plant, remember 7th grade science).

So the grand plan:

A whole of experiments...

First thing, a windbreak.  A hedge row and trees to go around the property to stop everything from ending up in Kansas.  And as a bonus we are using some edibles as hedges.

A dry river bed that crosses the front yard.  It's called a rain garden, we divert the water from the house rain gutters into this "riverbed" landscaped with various flowers, bushes, ornamental grasses, and ground covers.

Ornamental flowers around the front porch with various pathways.

Some potted plants for the front porch.

Hedges, bushes, and trees to add height and contrast.

And a mix of no/low mow grasses and groundcovers to fill in the rest.

And for the back yard

 low mow grass/flower mix for a "yard", yep we are going to attempt starting a lawn from seed. 
 Then a large vegetable and fruit garden.  We will be experimenting with a bunch of types of gardening

 the traditional, just plant it in the ground
 square foot gardening
Earth Tainer
the gutter system
wicking beds
pallet gardening
container gardening
an African gardening method called keyhole gardening
and maybe even some aquaponics.

 Add an orchard comprised of compact high density fruit trees ( more on this later).  A compost area, fire pit and then maybe later we'll throw in some egg laying chickens to the mix.  That should keep me busy for a while.

Wednesday, April 23, 2014

Making Industrial Mixer Whisk Pendant Lights

Industrial Whisk Lighting Project

April 2014


I picked up these industrial whisks on Ebay some time ago and we finally get around to turning them into hanging lights for the kitchen.  They are 10-13 quart sized whisks from Hobart mixers.  I have been waiting for this project for months.


Here's how large the whisks are compared to my hand.  Best part of this project is that no whisks were harmed in anyway, so just in case you ever get an industrial mixer and need to whip up, I don't know, say 13 quarts worth of egg whites, you can just take apart your light fixture. 


You will also need some 1/6" twisted metal cable.   We picked this up at Ace Hardware.  They sell it by the foot.


Some 1/6" Ferrules and Stops and a washer for each whisk.  The two packages above are both Ferrule and Stop sets from different manufacturers.  You will need one pack (two ends) per light.   What size of washers?


Depends on the size of your whisk.  You want the washer to be narrow enough to slide in through the slot in the whisk.  But the whisk narrows at the top, so the washer needs to be large enough that it wedges in the whisk and can't fit through the top diameter.  The picture above probably illustrates this better than I can explain it.


We are starting with three regular mini pendant light fixtures you can get them from the big box store.

Step 1-  turn off the power to the lights, unless you really like to live dangerously and don't care for your eyebrows


Disconnect your light fixture.


And mark the wires for easy reassembly later.


Measure how long low you want your light to hang.


Loop one end the wire through the washer and secure by running it through a Ferrule and squeezing the metal together.  Run the wire through the whisk and wedge the washer in the top as pictured above.


Run the other end of the wire through the light fixture's base.


You will need to hold up your light fixture and trim the wire to slightly shorter than the lights electrical cord so that it supports the weight of the light.  This picture demonstrates the difference in length.


Secure the other end of the wire in the base with the second Ferrule stop.


Rewire your light fixture, insert light bulb, and that's it.


I found several whisks with different sizes and shapes.


And when you're all done, turn the power back on.

Friday, April 4, 2014

Yellow front door and the mechanical doorbell.

Ring my Bell

April 2014


This is our front door.  Pretty blaaaa, much like this weather has been.  The door is from Masonite, time for a little sunshine.


We broke out the Graco Magnum x5.  It's a refurbished unit I picked up online from www.cjspray.com  I was a little reluctant to buy a refurbished unit but this one works great and the customer service was awesome.  The first time we used it we had a problem with the hose that came with it and they took care of it right away.  This unit is so fabulous, we  were able to paint this door with a brush mark free finish in under 5 minutes.  We also painted all the interior door with this thing, but that's another post.


The before


And the fabulous.


It's a beautiful yellow from Sherwin Williams called White Raisin.  It brightens up the porch nicely.


And the best part, the mechanical doorbell.  This is the turnkey on the outside.


And the bell on the inside.  It's a vintage remake from the early 1800's.  How how does it sound?


Tuesday, April 1, 2014

Commercial vinyl aged wood flooring.

Goodbye plywood floors.  Hello, beautiful.

 January 2014

We have been looking at these plywood subfloors for too long.  It's time for flooring.

We had the contractor, L & M Covenant Construction, put the floors in the bathrooms, the laundry/mudroom, and the second bedroom upstairs.  Because, well, we're a little busy with other projects.  And lesson one folks, if you are doing DIY, know your limits.  Pick the projects that you have the time to complete, the tools do it right, and the ability.  Frankly, we saved a lot more money spending our time doing countertops and the kitchen and let the pros do their job on the floors.  And we really wanted to move in sometime soon.


 The first thing they did is lay down another layer of 5/8" subfloor.  This brought the floors up to about the same level as the hardward floors will be so there will be a smoother transition between floors and it really provided a much smoother surface than the rough plywood subfloor that is underneath.


The purple bathroom with new subflooring.


The laundry room completed.

                   Before                                                                                   After

The master bathroom


The flooring is a luxury vinyl from Spacia.  It is a commercial flooring in Weathered Oak.  It looks like aged wood, but is waterproof and no grout lines to clean.  It basically gets glued down in individual planks.  We had tile and faux tile cement in our last house and this is so much warmer on your feet.